Nail pops are considered one of the most important imperfections that show up literally on all types of drywall, including the ceilings and interior walls. If not repaired on time, nail pops may lead to serious damages to the drywall. Although nail pops do not affect your drywall’s structural 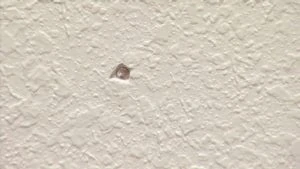 stability, it may create some cosmetic annoyances on your drywall, which too can be fixed easily.
Nail Pops Can Mostly be Seen in Older Homes:
Modern drywalls are built with drywall screws and the same cannot pop out accidentally. With modern drywall nail pops are fortunately becoming less annoying matter.
However, nail pops is a serious issue in older homes. These types of old houses have not been remodeled subsequently and will always have drywall installed with nails, not screws. Also, you can find few drywall installers who still prefer to use nails when installing drywalls nowadays. These types of drywalls can also be affected by the problems of nail pops.
What causes nail pops in drywall?
Nail pops are usually about the size of a quarter and they are either flat bubble-shaped. Nail pops can usually be seen over the point at which the drywall has been affixed to the wood framing as the house settles.
In order to repair the nail pops in drywall you can follow the below-mentioned steps:
Use A Hammer to Down the Protruding Nail Back:
You can use a hammer to down the protruding nail back into the drywall. You should be careful about not breaking the paper face on the drywall. As a result, you will find a small, round indentation in the wall.
Secure the Drywall:
You also need to secure the drywall to the wooden studs by implementing a drywall screw. This would be a better option as drywall screws don’t have a tendency to shift as much as nails. You should place a drywall screw right above the existing nail. After that, you should drive the drywall screw right into the surface by using a drill.
Cover the drywall:
It is also important to cover the drywall by applying a thin layer of joint compound on the holes by using a drywall taping knife. You should label up the excess compound with the knife so that it is flush with the wall.
Dry The Joint Compound:
After that, you need to allow the joint compound to dry properly. Once done, you need to lightly sand the area and apply a thin coat of primer to the repair area. Then finally apply paint on the repair area to hide any imperfections.